Our The Planet Crafter Building Guide will tell you everything you need to know about building an awesome (and functional) base in this open-world survival crafting game!
How The Planet Crafter Building Works
The Planet Crafter Building works like most other games -- you go into a menu, select a building, and place it. This game uses a grid-based system, sadly, so you won't be able to fine-tune your base to perfection.
There are some restrictions, mind -- you can't build on rocks or crashed ships and you can't build underground, either. That said, you have plenty of room to make an awesome base!
How to Unlock More Buildings in The Planet Crafter
There are two ways to unlock The Planet Crafter buildings. The first way is by progressing Terraforming and Biomass -- you'll automatically unlock new buildings (and get an in-game notification when you do). A smaller subset of buildings can only be unlocked by finding and using Blueprint Microchips.
How Power Works in The Planet Crafter
The Planet Crafter's Power system is somewhat more lenient than most other open-world survival crafting games. You don't need to connect Buildings to Power generators with wires, nor do you need to build any batteries or anything like that.
All Power generators power all Buildings on the map, regardless of the distance. That means that you could build a Nuclear Reactor on the other side of the map and it would provide Power to all of your buildings just fine.
Is There Structural Integrity in The Planet Crafter?
No, there is no structural integrity system in The Planet Crafter. That means that you could set up a base floating in the air if you felt like it!

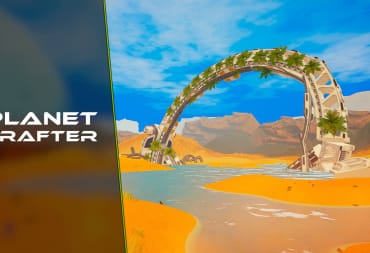
Where Should You Build Your Base in The Planet Crafter?
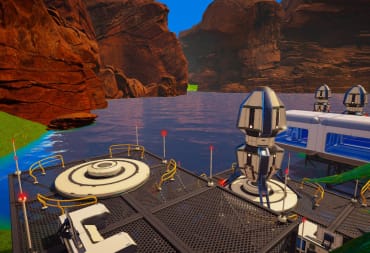
You should build your base in a convenient spot where resources respawn or can be mined with an Ore Extractor. The area around the default starting zone is perfectly placed in the middle of most of the things you'll need.
I built my base at the coordinates 800:27:670 -- that's pretty much a stone's throw away from the default starting area. This area is roughly equidistant to the rarer ores and it's right next to the biggest Lake in the game, too.
Warning: Watch Out for Flooding!
As you progress Terraforming, you'll eventually release a stage called "Lakes." This is when liquid water starts to appear on the map -- and it can submerge your base if it's too low to the ground. You can't restore Oxygen in a room that's underwater, so that would render your base useless.
Check out our Map of the game! This shows you where water will spawn after the Lakes Terraformation Stage is finished so you can avoid setting up a base in those areas.

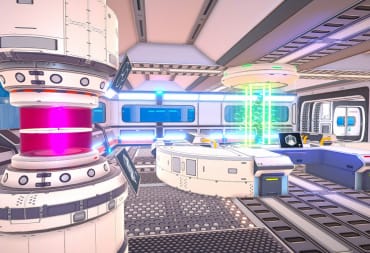
List of The Planet Crafter Buildings
Base Building
- Living Compartment
- 2 Iron, 1 Titanium
- A single room for your base.
- Living Compartment Door
- 1 Iron, 1 Titanium, 1 Silicon
- A door that lets you access a Living Compartment. Removing a Living Compartment Door will destroy the Living Compartment, too. Can also be used internally to divide rooms.
- Living Compartment Window
- 1 Iron, 1 Cobalt. Removing a Living Compartment Window requires destroying the Living Compartment as well. Can also be used internally to divide rooms.
- Living Compartment Glass
- 1 Titanium, 1 Cobalt
- A glass floor or ceiling for a Living Compartment. Be careful about placing it directly below the tile you're standing on -- you can fall through the floor! Destroying it requires destroying the Living Compartment, too.
- Biodome
- 1 Seed Lirma, 2 Titanium, 2 Cobalt, 1 Aluminum, 3 Super Alloy
- Oxygen - 135/s
- Energy - -37/s
- A large building that generates a lot of Oxygen, greatly speeding up the Terraforming process.
- Outdoor Stairs
- 1 Iron
- Stairs that let you reach greater heights. It can't be placed inside a building -- you'll need an Indoor Ladder to move between multi-level buildings.
- Outdoor Light
- 1 Iron, 1 Magnesium
- Energy - -0.3/s
- Generates a bright light in a particular direction. You can choose the color and the brightness of the light.
- Foundation Grid
- 1 Iron
- A cubic frame that can be used as a support structure, floor, or bridge. You can use Foundation Grids to quickly place down many buildings that require a structure for a floor such as a Crafting Station T2 or a Locker Storage.
- Launch Platform
- 3 Super Alloy, 3 Titanium, 3 Iron
- Energy - -55/s
- Allows you to launch Rockets into space which can provide Map functionality or boost the effects of Terraforming and Biomass generation.
- Indoor Ladder
- 1 Iron, 1 Cobalt
- Allows you to move through the roof of a Living Compartment. Has to be placed inside of the Living Compartment first.
- Biolab
- 2 Osmium, 3 Super Alloy, 1 Aluminum
- Allows the crafting of recipes used in Farming and Biomass generation.
- Biodome T2
- 2 Fertilizer, 2 Bacteria Sample, 2 Super Alloy, 1 Sulfur
- Oxygen - 1,450/s
- Energy - -75/s
- Biomass - 11/s
- Generates Tree Bark and is one of the best ways to generate Oxygen for Terraforming until you unlock the Tree Spreader.
- Living Compartment Corner
- 1 Iron, 1 Titanium, 1 Cobalt
- A rounded corner piece for your Buildings with a built-in window.
- Area Lamp
- 1 Magnesium, 1 Cobalt
- A lamp with a softer glow that lights up the surrounding area. You can change the color and the brightness of the light. Can be used indoors and outdoors.
- Big Living Compartment
- 3 Iron, 3 Titanium, 2 Super Alloy
- A larger building equivalent to a 2x2 arrangement of Living Compartments but with slightly more open space inside.
- Fence
- 1 Silicon
- Provides a physical barrier to block movement (and keeps you from falling off of platforms).
Machines
- Craft Station T2
- 1 Iron, 1 Silicon
- Energy - -0.5/s
- Allows you to Craft more recipes than are available in the Craft Station T1 in your Drop Pod.
- Vegetube T1
- 1 Iron, 1 Ice, 1 Magnesium
- Oxygen - 0.15/s
- Energy - -0.35/s
- Generates Oxygen for Terraforming. Requires a Seed.
- Vegetube T2
- 1 Iron, 2 Ice, 1 Magnesium, 1 Silicon
- Oxygen - 1.2/s
- Energy - -1.25/s
- Generates more Oxygen for Terraforming.
- Vegetube T3
- 1 Water Bottle, 2 Silicon, 1 Magnesium, 1 Aluminum
- Oxygen - 13/s
- Energy - -7.25/s
- Generates even more Oxygen for Terraforming.
- Drill T1
- 1 Titanium, 1 Iron
- Pressure - 0.2/s
- Energy - -0.5/s
- Generates Pressure for Terraforming.
- Drill T2
- 1 Iron, 2 Titanium
- Heat - 0.1/s
- Pressure - 1.5/s
- Energy - -5/s
- Generates more Pressure and a little Heat for Terraforming.
- Drill T3
- 2 Iron, 2 Titanium, 2 Aluminum
- Heat - 0.25/s
- Pressure - 17/s
- Energy - -8.5/s
- Generates even more Pressure (and a little more Heat) for Terraforming.
- Drill T4
- 6 Super Alloy, 3 Osmium
- Heat - 25/s
- Pressure - 459/s
- Energy - -45.5/s
- Generates a higher amount of Pressure and Heat for Terraforming.
- Drill T5
- 2 Super Alloy Rod, 1 Osmium Rod
- Heat - 295/s
- Pressure - 3,950/s
- Energy - -375.5/s
- Generates significantly more Pressure and Heat for Terraforming.
- Wind Turbine
- 1 Iron
- Energy - 1.2/s
- A cheap, early-game source of Power.
- Solar Panel T1
- 1 Iron, 2 Cobalt, 1 Silicon
- A much better early-game source of Power.
- Solar Panel T2
- 1 Iron, 1 Magnesium, 1 Silicon, 2 Cobalt, 1 Aluminum
- An even better source of Power that is even useful in the late game -- as long as you build a lot of them.
- Heater T1
- 1 Iridium, 1 Iron, 1 Silicon
- Heat - 0.3/s
- Energy - -1/s
- Generates Heat for Terraforming.
- Heater T2
- 2 Iridium, 1 Silicon, 1 Titanium, 1 Iron, 1 Aluminum
- Heat - 4.5/s
- Energy - -3.5/s
- A better source of Heat for Terraforming.
- Heater T3
- 1 Silicon, 1 Titanium, 1 Aluminum, 1 Iridium Rod
- Heat - 28.5/s
- Pressure - 0.6/s
- Energy - -17.5/s
- An even better source of Heat for Terraforming.
- Heater T4
- 3 Super Alloy, 2 Iridium Rod, 1 Explosive Powder
- Heat - 538/s
- Pressure - 35.5/s
- Energy - 51.5/s
- A significantly better source of Heat for Terraforming.
- Heater T5
- 3 Iridium Rod, 3 Explosive Powder, 3 Super Alloy Rod
- Heat - 4,530/s
- Pressure - 280/s
- Energy - -360.5/s
- The best Heat generation you can build to date.
- Beacon
- 1 Titanium, 1 Silicon, 1 Aluminum
- Energy - -0.25/s
- Puts a hexagon on your HUD that shows you where the Beacon is located. You can change the color of the Beacon.
- Communication Antenna
- 1 Silicon, 1 Titanium, 2 Iron, 1 Aluminum
- Energy - -15/s
- Allows you to receive communications from outer space. Requires a nearby Screen - Transmissions to read them.
- Advanced Craft Station
- Nuclear Reactor T1
- 3 Super Alloy, 2 Water Bottle, 1 Uranium Rod
- Energy - 86.5/s
- A much better source of Power than Solar Panels. Requires access to Uranium to make it.
- Nuclear Reactor T2
- 3 Water Bottle, 1 Super Alloy, 3 Uranium Rod, 1 Explosive Powder
- Energy - 331.5/s
- An excellent source of Power that does not require Zeolite.
- Ore Extractor
- 2 Osmium, 1 Iridium Rod, 1 Super Alloy, 1 Aluminum, 1 Titanium
- Heat - 17.5/s
- Pressure - 15/s
- Energy - -34/s
- Allows you automatically mine ore from the ground. Also generates some Heat and Pressure for Terraforming.
- Ore Extractor T2
- 3 Osmium, 3 Super Alloy, 2 Iridium Rod
- Heat - 79.5/s
- Pressure - 85/s
- Energy - -164/s
- Allows you automatically mine the higher-tier ores Osmium, Super Alloy, and Uranium. Also has a higher storage capacity than the Ore Extractor. It generates Heat and Pressure for Terraforming, too.
- Ore Extractor T3
- 1 Osmium Rod, 1 Super Alloy Rod, 1 Iridium Rod, 3 Titanium
- Heat - 202/s
- Pressure - 135/s
- Energy - -321/s
- Allows you to automatically mine any specific ore you select without collecting any unwanted ore. Will only mine certain ores (such as Uranium) if placed in the correct spawn point.
- Food Grower
- Food Grower T2
- 1 Water Bottle, 1 Super Alloy, 1 Fertilizer
- Energy - -29.5/s
- Increases your Farming output by growing Food faster. Must be placed indoors.
- Recycling Machine
- 2 Microchip - Deconstruction, 3 Super Alloy
- Allows you to break down Crafted items into their core components.
- Shredder Machine
- 2 Super Alloy, 1 Uranium, 1 Osmium, 1 Explosive Powder
- Allows you to permanently destroy items.
- Atmospheric Water Collector
- 1 Iron, 1 Silicon, 1 Magnesium, 1 Cobalt, 1 Aluminum, 1 Super Alloy
- Energy - -11/s
- Automatically collects Water from the air over time. An infinite source of Water.
- Grass Spreader
- 2 Water Bottle, 1 Magnesium, 1 Aluminum, 1 Seed Lirma
- Oxygen - 108/s
- Energy - -13.8/s
- Biomass - 0.15/s
- Grows grass in the surrounding area and is one of your first options to generate Biomass. Also increases Oxygen for Terraforming.
- Flower Spreader
- 3 Water Bottle, 1 Super Alloy, 1 Magnesium, 1 Fertilizer
- Oxygen - 161/s
- Energy - -28.8/s
- Biomass - 7.2/s
- Grows grass and flowers in the surrounding area, but requires a Seed to function. The seed determines what kind of flowers will grow. A significant improvement over the Vegetube T3. Also increases Oxygen for Terraforming.
- Flower Spreader T2
- 2 Water Bottle, 2 Super Alloy, 2 Fertilizer
- Oxygen - 325/s
- Energy - -38.8/s
- Biomass - 33.5/s
- An improved version of the Flower Spreader.
- Algae Generator
- 1 Bioplastic Nugget, 1 Eggplant, 1 Water Bottle, 1 Magnesium, 1 Super Alloy
- Oxygen - 127/s
- Energy - -13/s
- Biomass - 0.6/s
- Generates Algae underwater, a Crafting resource that is needed for higher-end Farming and generating Biomass. Also creates Oxygen for Terraforming.
- Algae Generator T2
- 2 Bioplastic Nugget, 1 Fertilizer, 1 Water Bottle, 1 Magnesium, 2 Super Alloy
- Oxygen - 350/s
- Energy - -27/s
- Biomass - 17/s
- An improved version of the Algae Generator that makes better contributions to Terraforming and Biomass generation.
- Lake Water Collector
- 3 Bioplastic Nugget, 1 Magnesium, 1 Aluminum, 1 Super Alloy
- Energy - -19/s
- Lets you collect drinkable Water from Lakes.
- Gas Extractor
- 3 Super Alloy, 2 Zeolite, 1 Iridium Rod
- Heat - 13/s
- Energy - -58/s
- Generates Methane Cartridges (and occasionally Oxygen Capsules), a Crafting resource that is necessary for high-end Biomass generation.
- DNA Manipulator
- 1 Super Alloy, 1 Bioplastic Nugget, 1 Explosive Powder, 1 Pulsar Quartz
- Energy - -117.5/s
- Allows you to make Tree Seeds for Tree Spreaders.
- Tree Spreader
- 1 Super Alloy, 1 Bacteria Sample, 1 Fertilizer, 1 Tree Bark, 1 Bioplastic Nugget
- Oxygen 0 920/s
- Energy - -31/s
- Biomass - 85/s
- Contributes to Terraforming and Biomass generation. Place this Building as close to the shore as possible -- trees will grow on land depending on which Tree Seed you've placed inside.
- Tree Spreader T2
- 1 Super Alloy, 1 Bacteria Sample, 1 Tree Bark, 1 Fertilizer T2, 1 Zeolite
- Oxygen - 1,950/s
- Energy - -71/s
- Biomass - 149/s
- An improved version of the Tree Spreader.
- Tree Spreader T3
- 1 Super Alloy, 1 Bacteria Sample, 1 Tree Bark, 2 Fertilizer T2, 1 Zeolite
- Oxygen - 12,500/s
- Energy - -193/s
- Biomass - 680/s
- A significantly better version of the Tree Spreader.
- Nuclear Fusion Generator
- 5 Pulsar Quartz, 4 Super Alloy
- Energy - 1,835/s
- The best source of Power in the game, but it also requires the rare resource Zeolite.
- Teleporter
- 1 Super Alloy Rod, 1 Osmium, 1 Zeolite, 3 Pulsar Quartz
- Energy - -276/s
- Allows you to teleport to any other Teleporter you've placed.
- Incubator
- 1 Tree Bark, 1 Fertilizer T2, 1 Super Alloy, 1 Oxygen Capsule
- Energy - -215/s
- Allows you to create Larvae to grow your Insects population.
- Beehive
- 1 Bee Larva, 1 Super Alloy, 1 Fertilizer, 1 Bioplastic Nugget
- Energy - -25/s
- Plants - 350/s
- Insects - 15/s
- Gives a significant boost to Plants production and produces Honey.
- Outdoor Farm
- 2 Bee Larva, 1 Water Bottle, 1 Fertilizer, 1 Fertilizer T2, 1 Super Alloy
- Energy - -45.5/s
- Plants - 95/s
- Insects - 8/s
- Allows you to farm outdoors while also spreading the growth of Plants and Insects.
- Silk Generator
- 3 Silk Worm, 1 Zeolite, 1 Water Bottle, 1 Oxygen Capsule
- Energy - -38/s
- Allows you to automatically create Silk, which can be used to craft Fabric.
- Butterfly Farm
- 1 Fertilizer T2, 1 Zeolite, 1 Bioplastic Nugget
- Energy - -30/s
- Insects - 75/s
- Provides a boost to Insects and visually shows butterflies flying around.
- Auto-Crafter
- 2 Osmium, 1 Super Alloy Rod
- Energy - -155/s
- Automatically can craft a single selected recipe from any other containers in range. Has 8 built-in inventory spaces.
Information Screens
- Screen - Terraformation
- 1 Iron, 1 Cobalt, 1 Silicon
- Energy - -0/4s
- Shows you the progress of Oxygen, Heat, and Pressure Generation for Terraformation. Also shows Biomass growth progress once you unlock it.
- Screen - Blueprints
- 1 Iron, 1 Silicon
- Energy - -0.2/s
- Shows you what you can unlock by progressing Terraforming, Oxygen, Heat, and Pressure. This is also where you use Blueprint Microchips to unlock unlisted Crafting recipes.
- Screen - Energy Levels
- 1 Iron, 1 Silicon, 1 Magnesium
- Energy - -0.4/s
- Shows you how much Power is being generated and consumed and provides a breakdown of both on a per-Building basis.
- Screen - Transmissions
- 1 Iron, 2 Silicon, 1 Magnesium
- Energy - -0.4/s
- Shows messages you've received from offworld. Requires a nearby Communication Antenna. Keep in mind that the Communication Antenna needs to be fairly close for it to work.
- Screen - Progress
- 1 Iron, 2 Silicon, 1 Cobalt
- Energy - -1.3/s
- Shows you the progress of the current Terraformation Stage.
- Screen - Mapping
- 1 Microchip - Compass, 1 Iron, 1 Silicon
- Energy - -1.4/s
- Shows you a map of the surrounding area -- not the entire planet -- as long as you've launched a GPS Satellite into orbit.
- Screen - Orbital Informations
- Energy - -35.2/s
- 1 Microchip - COmpass, 1 Osmium, 1 Silicon
- Shows you how many Rockets you've launched and how much of a bonus they're providing.
- Sign
- 1 Magnesium
- Displays custom text.
- Screen Biomass
- 1 Iron, 1 Silicon, 1 Aluminum
- Energy - -3.4/s
- Provides details on your progress with Biomass.
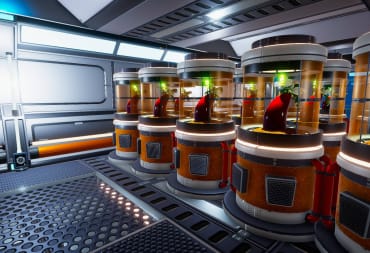
Furniture
- Storage Crate
- 1 Iron
- Stores 15 items. Features a text label that you can change.
- Locker Storage
- 3 Iron
- Store 35 Items. Features a text label that you can change.
- Desktop
- 2 Iron
- A flat surface that is good for placing Screens on.
- Chair
- 1 Iron, 2 Fabric
- Unfortunately, you can't sit in the chair as of Early Access version 0.4.004 -- it's purely decorative for now.
- Bed
- 1 Iron, 3 Fabric
- Purely decorative -- you don't need to sleep, nor can you use the bed.
- Sofa
- 1 Iron, 2 Fabric
- Purely decorative -- you can't yet sit down in the game.
- Sofa Angle
- 1 Iron, 2 Fabric
- A corner-shaped sofa piece. You can't sit on this one, either.
- Double Bed
- 1 Iron, 6 Fabric
- A wider bed for two people. You can't sleep in this one, either.
- Table
- 1 Iron, 1 Titanium
- A low, circular table similar to a coffee table.
- Flower Pot
- 1 Magnesium, 1 Cobalt, 1 Fertilizer
- Allows you to plant a Seed and grow a flower indoors.
- Display Case
- 2 Cobalt, 1 Iron, 1 Super Alloy
- Allows you to display up to 6 items across two shelves.
- Butterfly Display Box
- 1 Iron, 1 Fabric
- Allows you to display Butterflies.
That's it for The Planet Crafter Building Guide! If you liked this guide, why not check out our other The Planet Crafter Guides?
Have a tip, or want to point out something we missed? Leave a Comment or e-mail us at tips@techraptor.net
One of my earliest memories is playing Super Mario Bros. on the Nintendo Entertainment System. I've had a controller in my hand since I was 4 and I… More about Robert N